
Have you ever played a game with your friends where you needed to work together to win? Imagine you’re a brave Helldiver in the super cool video game, Helldivers 2! In this game, you and your friends team up to fight scary bugs and robots on faraway planets. It’s a lot of fun, but it can be tough too!
To win in Helldivers 2, you and your team need to talk to each other. Think of it like being on a sports team – you need to tell your teammates where the ball is, who to pass to, or where the goal is, right? In Helldivers 2, you can talk using your voice, or even type messages. But sometimes, when things get really crazy and bugs are attacking from everywhere, talking can be too slow!
That’s where the super helpful “ping” system comes in! Imagine you could just point with your finger and everyone on your team instantly knows what you’re pointing at. That’s kind of what pinging is like in Helldivers 2! It’s a super speedy way to show your friends important stuff in the game, like a big scary enemy or a place you need to go.
Think of it like this: you’re playing hide-and-seek, but instead of just saying “I see you!” you can put a big flashing arrow on top of where you see someone. Everyone playing instantly knows where to look. That’s how pings help in Helldivers 2. They help you and your friends see important things super fast, so you can work together like a well-oiled machine and win missions!
Learning how to ping is like learning a secret superpower in Helldivers 2. It makes you a better teammate and helps everyone have more fun. It’s especially helpful when you’re playing on harder missions where everything is even more chaotic and dangerous. Imagine planets that are super dark, or covered in thick smoke where you can barely see your hand in front of your face! In those tough spots, a quick ping can be a lifesaver. It can tell your team, “Hey! Watch out for that giant bug!” or “Let’s go to this building over here!” in just a blink of an eye.
Even though Helldivers 2 is really good at showing you how to shoot and fight, it doesn’t exactly explain how to use the ping system very well. It’s like the game expects you to already know! But don’t worry, it’s actually pretty easy once you learn how. It’s not a secret rule that only super good players know, but understanding pings is something EVERY Helldiver should learn to be awesome.
So, are you ready to become a pinging pro and an even better Helldiver? Let’s learn how to use pings to mark enemies, cool places, and even spots on your map! Get ready to level up your teamwork skills!
Also read: Helldivers 2: Best Heavy Armor
Pinging Like a Pro: Spotting Enemies and Points of Interest
Okay, let’s get down to the nitty-gritty and learn how to actually use pings in Helldivers 2. It’s super simple, like pressing a button and BAM! You’ve told your team something important.
How to Ping in the Game:
Imagine you see a big, scary bug monster charging at you! You need to tell your team to shoot it, FAST! Here’s what you do:
- Look at what you want to ping: Point your Helldiver’s view at the enemy bug, or maybe a building you want to check out, or just a spot on the ground you want your team to see.
- Press the Ping Button:
- On PlayStation 5: Press the R1 button (it’s on the top right of your controller).
- On PC: Press the Q button (it’s on your keyboard, usually on the left side).
That’s it! When you press the ping button, a little icon will pop up for all your teammates to see.
- Red Crosshair for Enemies: If you ping an enemy, like one of those creepy bugs or a robot, a red crosshair will appear above their head. This is like saying, “Hey team, shoot THIS bad guy!” It’s a clear signal to focus fire and take down that enemy quickly.
- White Eye for Everything Else: If you ping anything that’s not an enemy, like a building, a rock, or just a spot on the ground, a white eye icon will appear. This could mean lots of things! Maybe you want to explore that building, or warn your team about a dangerous area, or just show them where you are going.
Getting Rid of Pings:
Oops! Did you ping the wrong thing? Or maybe the danger is gone now? No problem! You can easily make a ping disappear. Just ping the same thing again! Press the R1 (PS5) or Q (PC) button while looking at the pinged spot, and poof, it’s gone.
Pings Don’t Last Forever:
Just like a shooting star, pings in Helldivers 2 only last for a little while before they disappear on their own. They stick around for a few seconds. This means you don’t want to just ping everything all the time. Only ping the really important stuff! And if something is still important after a few seconds, you might need to ping it again to remind your team.
Don’t Spam Pings!
Imagine if someone kept shouting the same thing over and over again – it would get annoying, right? Pinging too much is the same thing! If you ping everything you see, your teammates might get confused and miss the really important pings. So, use pings wisely and only when you really need to point something out. Think of it like using your words carefully – make them count!
Ping Important Things, Like:
- Big, Scary Enemies: Bile Titans, Chargers, and other tough bugs or robots that need to be taken down fast!
- Groups of Enemies: Lots of smaller enemies rushing your team.
- Objectives: Places you need to go to complete your mission, like a control panel to activate or a building to search.
- Danger Spots: Areas with lots of enemy fire, mines, or other hazards you want your team to avoid.
- Cool Stuff: Sometimes you might find special items called “Samples” that you need to collect. You can ping these to show your team where they are.
Read also: Best Grenades in Helldivers 2
Pinging Works for Everyone!
No matter if your friends are playing on a PlayStation 5 or a PC, they will all see your pings! It’s like a universal language that all Helldivers understand. Teamwork makes the dream work, and pings are a big part of teamwork in Helldivers 2!
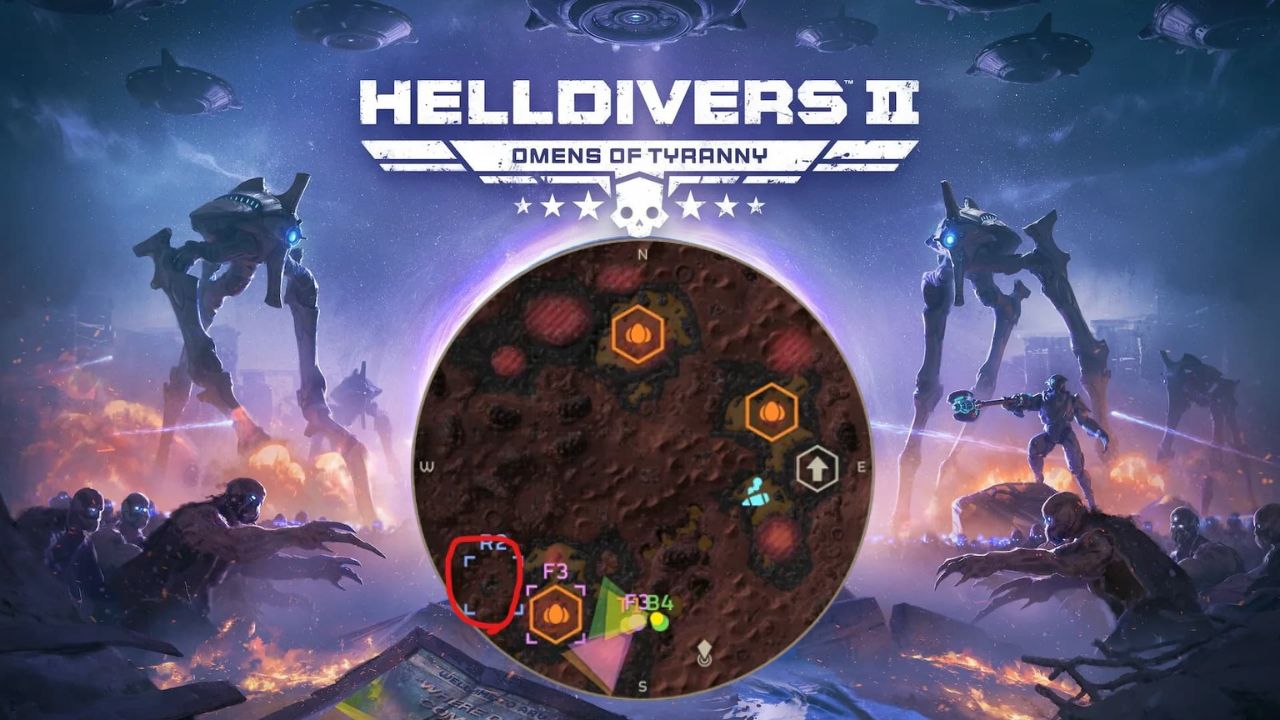
Map Magic: Marking Locations on Your Mini-Map
Sometimes, you need to tell your team about a place that’s far away, or hidden behind a building, something you can’t just point at directly. That’s where marking locations on your mini-map comes in super handy! Your mini-map is like a smaller version of the whole battlefield, and you can use it to plan and show your team where to go.
How to Open and Use Your Mini-Map:
- Open the Mini-Map:
- On PlayStation 5: Press the Touchpad button (the big button in the middle of your controller).
- On PC: Press the Tab button (usually on the left side of your keyboard, above the Caps Lock key).
- Move Around the Map (PC Only):
- Hold the Right Mouse Button: Press and hold down the right button on your mouse.
- Move Your Mouse: While holding the right mouse button, move your mouse around to look at different parts of the map.
- Mark a Location:
- On PC: Find the spot on the map you want to mark and left-click with your mouse.
- On PlayStation 5: Use the joystick (the stick on the left side of your controller) to move a little cursor around the map. When you have the cursor where you want to mark, press the X button (the button on the right with an X on it).
Why Mark Locations on the Mini-Map?
There are two main super reasons to mark locations on your mini-map:
- Marking Things You Can’t See: Sometimes, important objectives or places with goodies are far away, or around corners, or in buildings. You can’t ping them directly because you can’t see them. But you can see them on your mini-map! So, you can mark those locations on the map to show your team where to go, even if you can’t see them from where you are. Maybe you see a question mark on your mini-map showing a side objective with extra rewards – mark it so your team knows to check it out!
- Long-Lasting Markers: Pings in the game disappear after a few seconds, but markers you put on the mini-map stick around for much longer! They only go away if you remove them yourself, or if you actually reach the marked location. This is super helpful for planning longer missions and remembering where you need to go next.
Super Useful Mini-Map Marking Moments:
- Objective Planning: Before you start running off, open your mini-map and mark the main objectives so everyone knows where to head.
- Extraction Zone: When your mission is almost done, and you need to get to the escape ship (the extraction zone), mark it on the map so you don’t get lost, especially if you’ve wandered off collecting resources.
- Sample Locations: If you see those “Samples” icons on your mini-map, mark them so you and your team can collect them to upgrade your ship later.
- Rally Points: If your team gets split up, you can mark a spot on the map as a “rally point” – a place for everyone to meet up again.
Marking locations on your mini-map is like being the team’s navigator! You help everyone know where to go and what to do, making your missions smoother and more successful!
Recommended: How to Fix Helldivers 2 Servers at Capacity
The Comms Wheel: Talking Without Typing (or Yelling!)
Sometimes, you need to say something quick to your team, but you don’t have time to type a message, and maybe you don’t have a microphone to talk. Helldivers 2 has a cool feature called the “Comms Wheel” that lets you say pre-set messages with just a few button presses! It’s like having a bunch of quick phrases ready to go whenever you need them.
How to Use the Comms Wheel:
- Open the Comms Wheel:
- On PlayStation 5: Hold down the R1 button (the same button you use for pinging!).
- On PC: Hold down the Q button (again, the same as pinging!).
- Choose a Message:
- On PC: Move your mouse cursor to point at the message you want to say on the wheel.
- On PlayStation 5: Use the right joystick (the stick on the right side of your controller) to move and highlight the message you want.
- Say the Message:
- Let go of the R1 (PS5) or Q (PC) button. When you release the button, your Helldiver will say the message you chose out loud for your teammates to hear!
What Messages Can You Say?
The Comms Wheel has lots of useful pre-set messages, like:
- “Follow Me!” – Great for leading your team to a new objective or a point of interest.
- “Need Supplies!” – Use this when you’re running low on ammo or grenades and need your team to share.
- “Thanks!” – Politeness counts, even when fighting bugs! Say thanks when a teammate helps you out.
- “Yes” and “No” – Quick ways to agree or disagree with a team decision.
- “Sorry!” – Perfect for when you accidentally throw a grenade too close to a teammate (oops!).
- And more! There are other helpful messages too, so explore the Comms Wheel and see what’s available!
When to Use the Comms Wheel:
- Quick Orders: Need your team to move quickly? Use “Follow Me!”
- Resource Requests: Out of ammo? “Need Supplies!” is your friend.
- Team Decisions: Should you attack that bug nest? Use “Yes” or “No” to vote quickly.
- Oops Moments: Accidentally blew up a teammate? “Sorry!” goes a long way.
- Saying Thanks: Good teamwork deserves a “Thanks!”
The Comms Wheel is like having a super-fast way to talk to your team without stopping the action! It’s perfect for those moments when you need to communicate something important quickly and clearly.
Become a Ping Master and a Helldivers Hero!
Learning to ping enemies and locations, and using the Comms Wheel, might seem like small things, but they make a HUGE difference in Helldivers 2! These communication tools are your secret weapons for becoming a super effective teammate and completing even the toughest missions.
By using pings and map markers, you can:
- Help your team see dangers and opportunities faster.
- Plan strategies and move together more effectively.
- Complete objectives more quickly and easily.
- Become a better and more valuable teammate.
- Have even MORE fun playing Helldivers 2!
So, next time you jump into Helldivers 2, remember to use your pings, mark your map, and use the Comms Wheel. Practice using them, and you’ll be amazed at how much better you and your team will become! Get out there, Helldiver, and show those bugs and robots what teamwork is all about! For Super Earth!
Comments are closed.